Project Archives - AdvantEdge Training & Consulting
Project

Benefits of Using Resources In MS Project

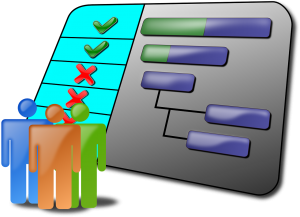
MS Project has many pieces of functionality that are not well known, or just not often used, because many users are not sure how to use them properly. Resources is one of those tools not widely used. However, it is useful to help the Project Manager and company decision makers keep costs in line with the projections, or help to adjust future plans moving forward. A ton of data is not available for these projections, when only portions of MS Project’s functionality is used by the Project Manager. Since cost, time, and scope dictate the success of a project,  tracking these constraints should be a regular part of project management, especially since all of these can be tracked in MS Project. Resources help us track costs, but we must fill in the appropriate information, or link to the desired information. Depending on the needs of the company, creating templates with predefined resources, or linking to another file where the resources reside can be viable options. Both have advantages and disadvantages. Filling in the resources every time you start a new project is time consuming, but it is important to know how to add this information. First, let’s look at how to find this area in the application: Under the Task tab, within the View group, click the Gantt Chart drop-down menu, and select Resource Sheet. From here, you add all the resources, so that they can be allocated to the individual tasks. While inputting this information can seem time consuming, templates can be used to help alleviate this monotonous task. Adding all resources to a template allows the same resources to be added to a project across the board, giving the Project Manager the capability to add or remove resources as needed. Linking to a separate resource file ensures that resources are not overbooked, which is especially important when several projects are running at the same time. Keeping track of the time each resource will be used in MS Project does a number of different things, but the two most important are the sum of the cost of resources used, and knowing when resources are over allocated. By using our resources correctly, we can see issues that are coming down the pipeline, allowing us to make critical decisions about how to rectify such issues. Note that the picture below shows us when resources are over allocated by placing red symbols in the Indicators column. You can hover on the indicators, in case you forget what they represent. Knowing the resources you have available to you also allows the scope to remain consistent, which can be beneficial for future projects that are similar in structure. By tracking resources, as well as where issues have occurred, it is possible for the Project Manager to alleviate issues by being able to pinpoint when and where they regularly occur, and then make decisions in future projects to keep the same thing from recurring. MS Project has so many tools that it can feel overwhelming to remember all of them. However, all of these tools are designed to work together to ensure successful projects. Resources tends to be the most underused functionality in MS Project, but when used properly, it can be one of the most important tools to keep issues to a minimum. Learn all of the tools and functionalities of Microsoft Project with a training course from AdvantEdge Training.

Benefits of Using Resources In MS Project Read Post »

Project, Project Management

5 Steps of Project Management – Step 1 – Initiating

Project managers divide each project into 5 steps, guiding it from conception to completion. These steps are Initiating, Planning, Executing, Controlling, and Closing. Today, we will discuss the first step, Initiating. Initiating the Project The project begins by choosing its goal: A building is being built; a division is being launched; a marketing campaign is being developed, etc. This goal is the Big Concept, and its completion or failure should be obvious. Use concrete and objective words to define the goal, as well as the time frame in which the project is to be completed. Avoid subjective terms, such as “improved” or “better,” or vague references, such as “in the future.” A solid example of a project goal would be “This project will see the construction of a five-story office building, with 50,000 square feet office space, in the Denver Tech area, and is to be finished by March of next year.” A weak example would be “We will create an ad campaign that will improve sales in the future.” With the project’s goal in mind, you must address three issues, during the project initiation phase: Project scope definition – Here, you must broadly define what is to be included in the project. If you are constructing a new building, is interior design to be included? Will the project be complete only once the C.O. is granted? Finer details will be finalized during the planning stage, but these high-level considerations should be established, now. Project manager appointed – Now is the time to appoint the one individual who is responsible for the entire process. With whom will the ultimate buck stop? Or course, the project manager will delegate duties, as appropriate, even management of specific areas of the project, but the project manager is the one with whom the ultimate responsibility of guiding the project to completion rests. Establish project milestones – Major projects need to have points along the way that help the project manager know that the project is on the right track. This can be viewed as mini projects within the overarching project. In the example of our building construction, one milestone could be to complete a geological study for the site, another might be to pour the foundation. As each of these milestones is reached, the project manager can assess if the plan is successfully progressing towards its overall goal. With the initiating stage complete, you are able to move to the next phase, Project Planning. AdvantEdge Training can help you learn more about successful Project Management.

5 Steps of Project Management – Step 1 – Initiating Read Post »

Project

Adding Subprojects in Microsoft Project

Project Managers might need to get lists of tasks for a project from more than one source in order to track everything throughout the project. The project manager could link the files, but in most cases, linking too many files can cause issues with the main Project file. When too many files are linked together, computers, connections, and Project file sizes can cause issues, unless your company is using the Enterprise level for MS Project Instead of linking the Project files, why not insert them as Subprojects? This process is very easy, and puts everything in one place. The main difference is that linked files update when the main file is opened, whereas Subprojects do not automatically update. Deciding which method to use is usually left up to the project manager, the software, and the system being used by the company. Regardless, using Subprojects is a viable option to add the necessary tasks from an outside source, so proper tracking can be managed. Here is how you can use Subprojects: Ensure you have the main Project file opened, and that you have access to the file, with the outside sourced tasks, to be added to the main Project file. Select the task to which you want the Subproject tasks added – Note that the imported set of tasks will always insert above the selected task. Click the Project tab of the ribbon, then click +Subproject in the Insert group, to the far left. Find and select the file you wish to insert, then click the Insert button.   The group of tasks will be inserted, and you are done! MS Project can help all of you projects runs smoothly; learn how with a training class from AdvantEdge Training.  

Adding Subprojects in Microsoft Project Read Post »

Project

Scroll to a Task in Project

Project can be used for small projects, large projects, and connected projects (two or more Project files). Regardless of the size, it can be annoying to try to find the exact position of a task in the task views. You know what task you are looking for, since you see it in the Task Name column.  When you start scrolling to it, though, it seems to take forever to actually reach. Since Project does not have a Name Box like Excel, how do we get where we are going quickly? We get there by using the Scroll to Task command. Check out how easy this command is to use: For our example, we are going to use the Ghantt Chart view in a template Project file. This particular file has 93 tasks. As you can see below, none of the bottom tasks are showing in the Ghantt Chart area. To use the Scroll to Task command, you must select the task you want by clicking the number of the task in the numbering column. Click the Task tab of the ribbon, and find the Scroll to Task command on the far right of the ribbon, in the Editing group. Click the command, and Project will take you instantly to the task in the Ghantt side of the view. This will get where you want to be, very fast – No more searching or manually scrolling to find your place. For more Project tips and tricks, check out AdvantEdge Training & Consulting’s Project Basic and Project Advanced classes.

Scroll to a Task in Project Read Post »

Project

Highlight the date in Project

If you are unsure about changing the format of certain parts in Project, it can be stressful, especially if you are worried you might mess something else up in the process. One of the parts that can be hard to see in Project is the line for today’s date. Changing the color of the line is actually pretty easy, compared to other areas of Project. Change the color of the line for today’s date in Project to something more visible by using the following steps: In Gantt Chart view, click the Gantt Chart Tools tab, and then the Gridlines command drop-down menu, located in the Format group Click the Gridlines… option, and a dialog box will open. Select Current Date in the Line to Change section Click the drop-down menu for the Color options, and select the color best fit for your needs Click OK, and you are done Learn more ways to make your work in Project easier with a class from AdvantEdge Training & Consulting.

Highlight the date in Project Read Post »

Project

Three Ways to Mark Tasks as Completed – Project

 Marking tasks as completed is an important part of keeping up with progress during a project. More than likely, Project Managers are not on job sites 24 hours a day, seven days a week. Thus, the Project Manager may update the Project file, or someone else might, and everyone has different ideas about what is easier to do, when it comes to software. In Project, there are a number of different ways to mark tasks as complete, so we are going to list three in this tip. 1:The easiest way to mark a task is to use 100% command, which is located on the Task tab, in the Schedule group. Before clicking the command, ensure you have the correct task selected. Click the 0% command, if you were on the wrong task. 2: Double-clicking on a task will open a dialog box for Task Information. In this dialog box, under the General tab, typing 100% in the Percent Complete field, then clicking OK, will mark a task as complete. The Task Information dialog box gives you a lot of information about the task. As a side note, it is worth becoming familiar with the different areas of this dialog box. 3: Using the Update Project dialog box will allow the user to update multiple tasks at once. To use this dialog box, select the Project tab, go to the Status group, and select the Update Project command. In this dialog box, selecting a date and clicking OK will mark all tasks, prior to and including that date, as complete. There are more ways to mark tasks complete that take more steps to find. These three steps are the easiest to find, as well as to explain to others who might be updating information in a Project file. Learn more ways you can make MS Project a powerful tool in managing your tasks and resources with a class from AdvantEdge Training & Consulting.  

Three Ways to Mark Tasks as Completed – Project Read Post »

Juggling Time
Project, Project Management

Project – From MS Project to Professional Project Management Concepts and Theory

Managing a project can involve keeping many balls in the air at one time. Luckily, AdvantEdge Training & Consulting has the classes to get you the skills you need to keep your projects – simple or complex – running smoothly. If you are new to managing any kind of project, Microsoft’s Project application is a great tool to keep your tasks and resources organized. AETC’s Basic MS Project course will give you the skills for developing a project plan, including developing a schedule and allocating resources. Our Advanced MS Project class covers the advanced concepts for designing more complex and comprehensive Microsoft Project plans, including the ability to update and adjust project plans as circumstances change, integrate other Microsoft resources into your project, and create visually impactful reports as your project progresses. To truly bring your project management skills to the professional level, enroll in our Introduction to Project Management course. This course focuses on the theory and core methodology you will need to manage projects, or participate on project teams. Understanding the conceptual underpinnings of project management will allow you to more effectively employ any project management application. If you want to gain the skills and knowledge to advance your career as a Project Manager, this course is an excellent place to begin. Register online, or contact our sales office for more information, including private group training, at (303) 900-8963 or [email protected] For our full calendar of classes, please visit our website.

Project – From MS Project to Professional Project Management Concepts and Theory Read Post »

Project

MS Project: Add Tasks to Timeline

Microsoft Project is a very robust program that allows you to view different views simultaneously, but one of the most popular added views is the Timeline. Typically, the timeline is added above whatever view is already showing, which is typically the Gantt Chart view, and can be easily turned on by following these steps: Click the View tab of the ribbon Click the checkbox for Timeline, located in the Split View group Once you have added the Timeline, you will need to add tasks, as tasks do not auto-populate themselves in the timeline. There are three ways to add a task to the timeline, which are added as follows: Task Tab Command Ensure the task you want to add is selected Click the Task tab Click Add to Timeline, located in the Properties group, towards the far right side of the ribbon Right-click Task Menu Right-click the task you wish to add in the timeline Click Add to Timeline, located towards the bottom of the menu Drag and Drop Select the whole task line, of the task to be dropped into the timeline by clicking on the task number Left-click and hold the task, then drag it up to the timeline. When the task is dragged up to the timeline properly, the cursor icon will switch to this — Release the mouse button and the task will be added to the timeline Learn more MS Project tips and tricks with a training course from AdvantEdge Training & Consulting

MS Project: Add Tasks to Timeline Read Post »

Project

Scheduling Calendar Days in MS Project

Normally, when we schedule work in a Project file, it is done on business day. This is common due to the fact that most companies have at least two days off each week. These days are typically Saturdays and Sundays in the business world, but business days can vary based on which part of the world a company resides or functions. Regardless, for Project, business days are different from calendar days, as calendar days include “weekends.” Keeping in mind that business days are normal for most companies, calendar days tend to be used less, but this does not mean calendar days should never be used for scheduling. Also, some companies have shift crews that allow a company to operate 24 hours a day for seven days a week. Every day for these companies would be considered a business day. (This can be a bit of a conflict for projects, but Microsoft Project does allow for setting up companies with specific calendars, which is a tip for another time.) Follow the steps below to change business days, which is Project’s default unit of measure, to show calendar days. In our example, we used a template from Project, which shows tasks that are created with normal business days: Note that the seven days for task 2 does not include Saturday and Sunday, depicting seven business days. If we change the unit of measure to 7 edays, it will include Saturday and Sunday, which looks like this: Learn more ways to make MS Project work for you with a training class from MCT.

Scheduling Calendar Days in MS Project Read Post »

Project

Add the “Current Date” Line or Change the Color

Add the “Current Date” Line or Change the Color Typically, a current date line is part of the Gantt chart, but sometimes it is not obvious, as it might look like a dotted vertical line. If this is the case, you can add or change the line to be more noticeable to anyone looking at the chart. To do this, use the following steps: Ensure you are in Gantt Chart view by clicking the View drop-down menu, located in the View group of the Task tab, and selecting Gantt Chart. Click into the Gantt chart are to activate the Gantt Chart Tools contextual tab. Click the Gridlines drop-down, located in the Format Group, and click the Gridlines option. Select Current Date from the dialog box, and note the various available options to the right. Click the Type drop-down and select the solid line option. Then choose a color that makes the most sense for your charts. Click the OK button, and note the changes in the dated section of the Gantt chart. If you are creating a template, doing this will ensure that the “Current Date” line is a part of every Project file, and that it is a color that stands out easily for others. Some Microsoft Project templates will already have the “Current Date” line activated, but the color can still be changed in those files as well. Get more Project training in Denver or Phoenix with AETC.

Add the “Current Date” Line or Change the Color Read Post »

If you have at least 5 people we can create a session just for you.  Or, you can contact us for a private session. Contact Us

Questions? Don't see what you need?

We can help!

Business Training Classes
AdvantEdge Training & Consulting, Inc.

Recent Posts

Subscribe to our Newsletter

Copyright AdvantEdge Training & Consulting

This site is protected by reCAPTCHA and the Google Privacy Policy and Terms of Service apply.

Scroll to Top