One easy way to dress up a Word document is to add pictures or graphics, but sometimes the pictures you have might need a little massaging before they will fit in place. Formatting pictures in Word can make round pictures fit in square holes and look better in the document.
Inserting pictures in Word
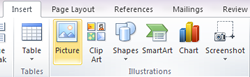 To insert a picture in Word, first put your cursor on the page in the place you want your picture. Then, click on Picture under the Insert tab. Navigate to the picture you want and click on open. The picture will appear where your cursor was.
![]() If you select the picture by clicking on it, the contextual tab Picture Tools Format will appear at the end of the list. The tools for formatting pictures in Word will be located in this tab.
If you select the picture by clicking on it, the contextual tab Picture Tools Format will appear at the end of the list. The tools for formatting pictures in Word will be located in this tab.
Resizing pictures in Word
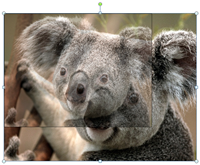 Your Picture may be too large or too small for the space. To resize the picture, click on the picture and then hover your arrow over one of the corners. Your arrow will become two sided. Click and drag the corner to adjust to the size you need.
You can also use the boxes on each side of the picture to adjust the height and width, but this can warp the picture.
Cropping pictures in Word
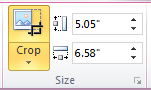 Click on the picture to bring up the Picture Tools Format tab and then click on Crop under the Size group. Dark lines will appear on the sides and corner of the picture. Click and drag these lines to darken any parts of the picture that need to be cropped out. Then, click on Crop again. The image will be cropped.
Images can also be cropped to specific shapes. Click on the drop down arrow just below the word Crop and choose Crop to Shape. Find the shape you want and click on it.
Wrapping Text around pictures in Word
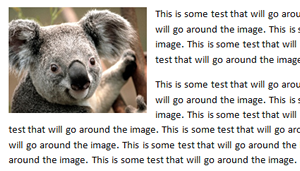 By default text, does not wrap around pictures. Pictures are inserted In line, and this can look very awkward. Word has a feature for wrapping text around an image like this text is wrapped around these images.
After selecting the image and bringing up the Picture Tools Format tab, click on Wrap text in the Arrange group. There are several options for how it should look. Square, Tight, and Through make the text flow around the image. Behind Text and In Front of Text make the image into a background or cover up the text with the image.
Formatting Pictures in Word with brightness, contrast, color, and effect
In the Picture Tools Format tab, the Adjust group has several options for improving or warping the quality of the picture.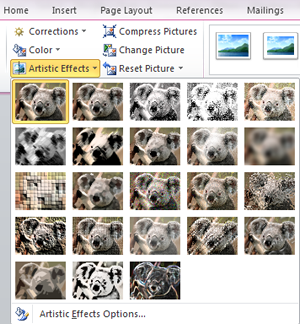 The Corrections drop down offers options for changing the brightness or focus of the image. The Color dropdown has options for skewing the color of the image toward red, green, or blue.Artistic Effects has some interesting options for changing the appearance.