When people are typing information into a database, it is not always obvious how information is supposed to be entered. In many cases, having consistency in the way data is entered is crucial for custom functionality. Therefore, control through data validation is very important.
Input Masks are one type of data validation that ensure information is typed in the same way every time.
For our exercise, we are going to setup an Input Mask for telephone numbers, but there are additional options for Input Masks, including the option to custom build masks.
Follow the steps below to setup a mask:
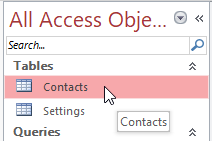
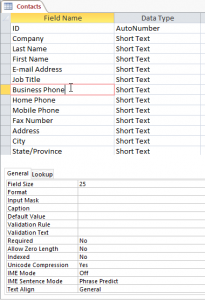
- Open Access. Then open the table for which you need to add the Input Mask by double-clicking on the table, located in the Object Pane to the left. We are going to use the Contact table of our database, and add an Input
 Mask to the Business Phone field.
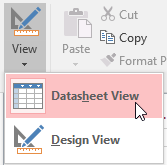
 - Once the table is open, go to the Home tab of the ribbon, click the drop-down menu for Views, and select Design View.
- Once in Design View, click on the field you want to add the Input Mask.
- This will open the Field Properties tabs underneath the list of fields, so we need to click in the field labeled Input Mask.
- Next, click the button with the … (to the far right side of the field), which will open the Input Mask Wizard.
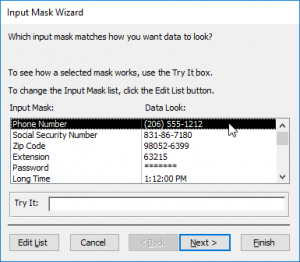
- Ensure the Phone Number is the chosen option and click Next.
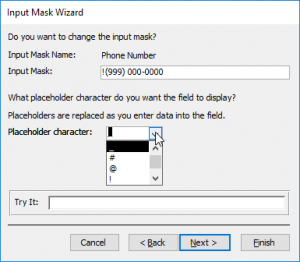
- The next dialog box allows you to see how the mask appears with information filled in, and allows you to choose your placeholder symbols. Once done, click Next.
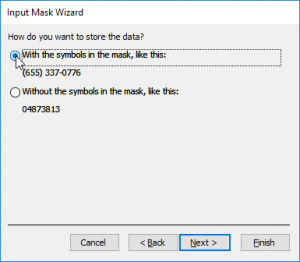
- Select the way you want the field to look for entering data. Many people choose the option to see the mask while typing data into the field, as it gives the user a better feeling about the data they are entering. Thus, we will choose the first option and click Next.
- Click Finish, and the mask will be added to the field. You will see the Input Mask populate in the Field Properties.
- Go back to the Datasheet View, ensuring to confirm that you want to Save the table.
- Add a new item by tabbing across the fields in the record. Note that the Business Phone now has an Input Mask.
 Mask to the Business Phone field.
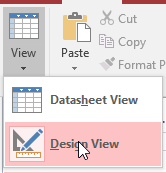

 Add a new item by tabbing across the fields in the record. Note that the Business Phone now has an Input Mask.
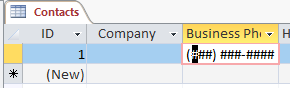
There are additional options in the Input Mask Wizard, but you can also type custom Input Masks directly into the field property.